Brutalist architecture has often been more about the aesthetics of simplicity and functionality rather than simplicity and functionality themselves. Still, it has always held the promise of designs which are the result of dedicated focus on that functionality, and I've spent much time speculating about how many things—cars, computers, appliances—would look if they had been designed like that. Examples of these are rare, but the redesign of the Mattress Cooler is one of them.
Background
The Mattress Cooler is a product that does exactly what it says and is made by a company of the same name. Briefly, it has a reservior of water and a pump which circulates water through a mat on top of your mattress to keep you cool. After the water comes back from the mat it is dripped over an evaporation pad which is in front of a fan to increase evaporation and keep the water cool.
The outside of the cooler looks fairly conventional for a household appliance. It has two ports on the side to connect the tubes which lead to the mat. On top there are some buttons and a display for control, and a panel which you can remove to add water to the cooler.

Inside, there's the reservior, the fan, the evaporative pad, and a miscellanea of wiring and plumbing.

The pad is not shown because it was gross
This original version is about par for the course as far as a household appliances. The case, reservior, and brackets are all injection-molded plastic with screws to hold them together. It could have easily come out of any of the dozens of corporations that make this class of product. However, the successor to this version is far less conventional.
Version 2
The original version of the mattress cooler was discontinued and a significantly different one was released as a replacement. Here you can see it on the right. We'll look the differences between them broken down into the body/construction, plumbing, and electrical systems.
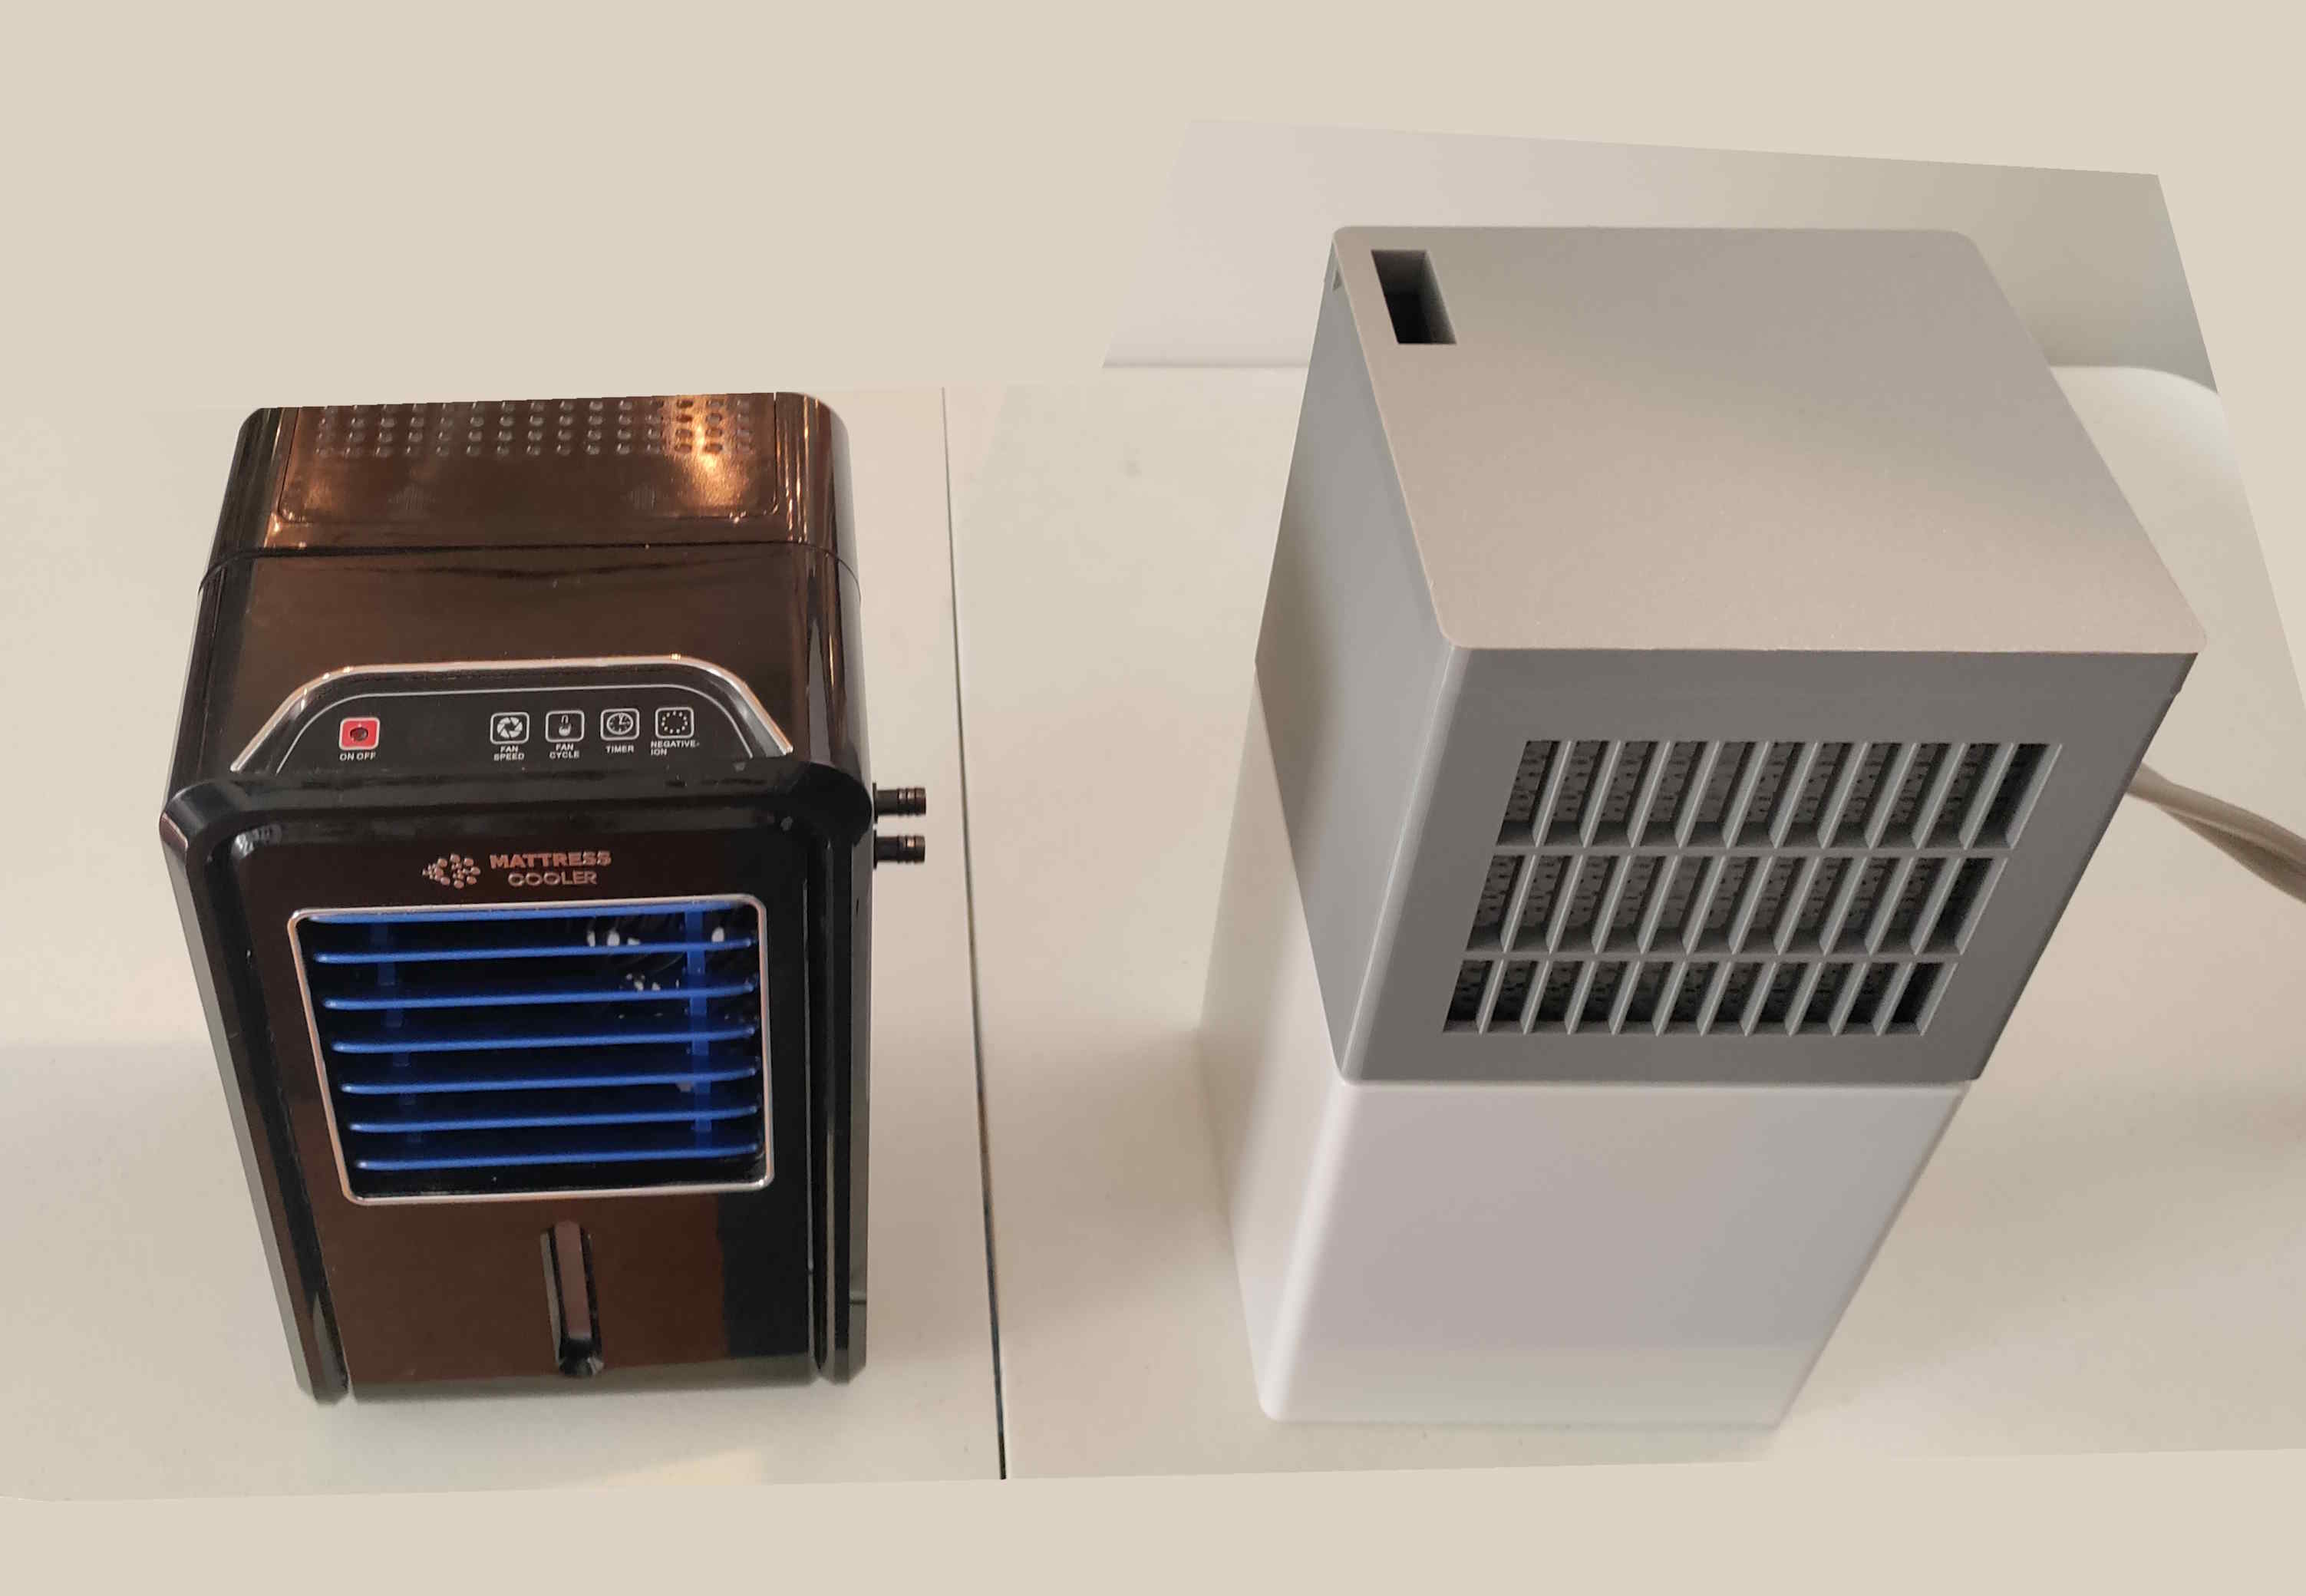
The opening on the top of the new one is for filling it up. It comes with a funnel that fits the opening.
Body
The most obvious difference in the new design (when you see it up close) is the fact that it is almost entirely 3D printed (the whole gray case on top). Taking off the lid we see that it has an integrated drip trough where the water can drip down on to the filter after being pumped through the mat.
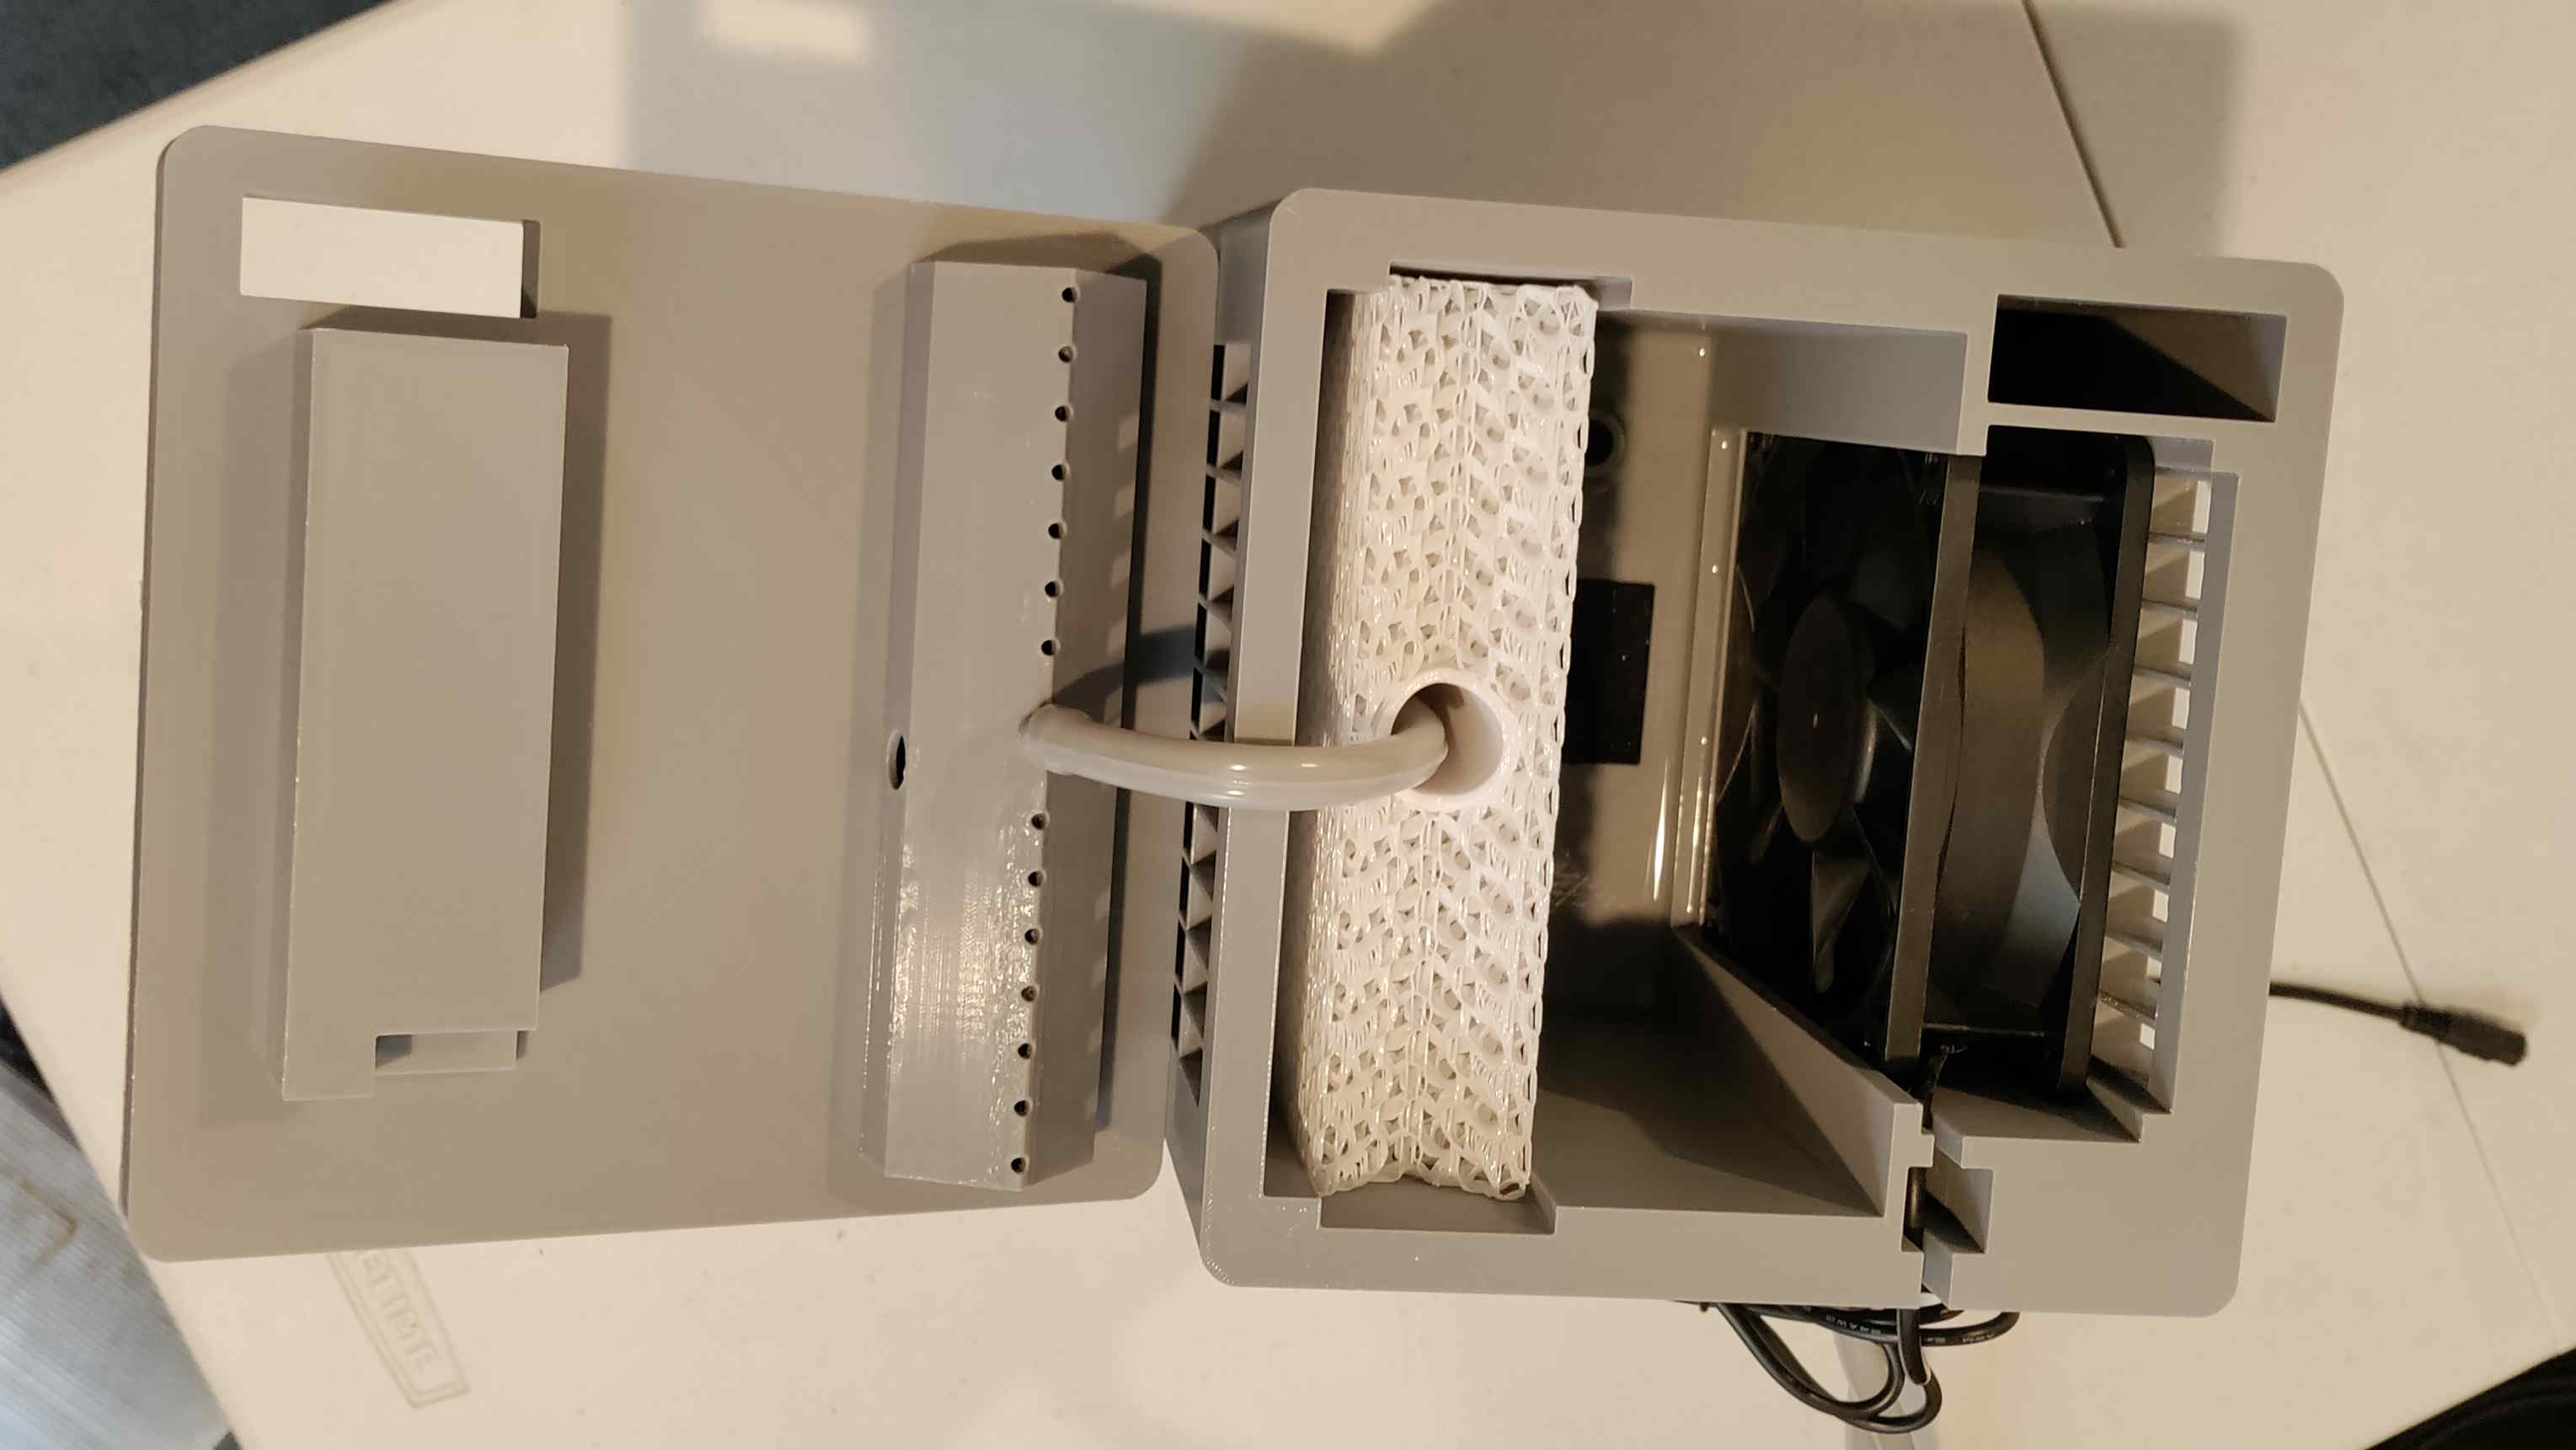
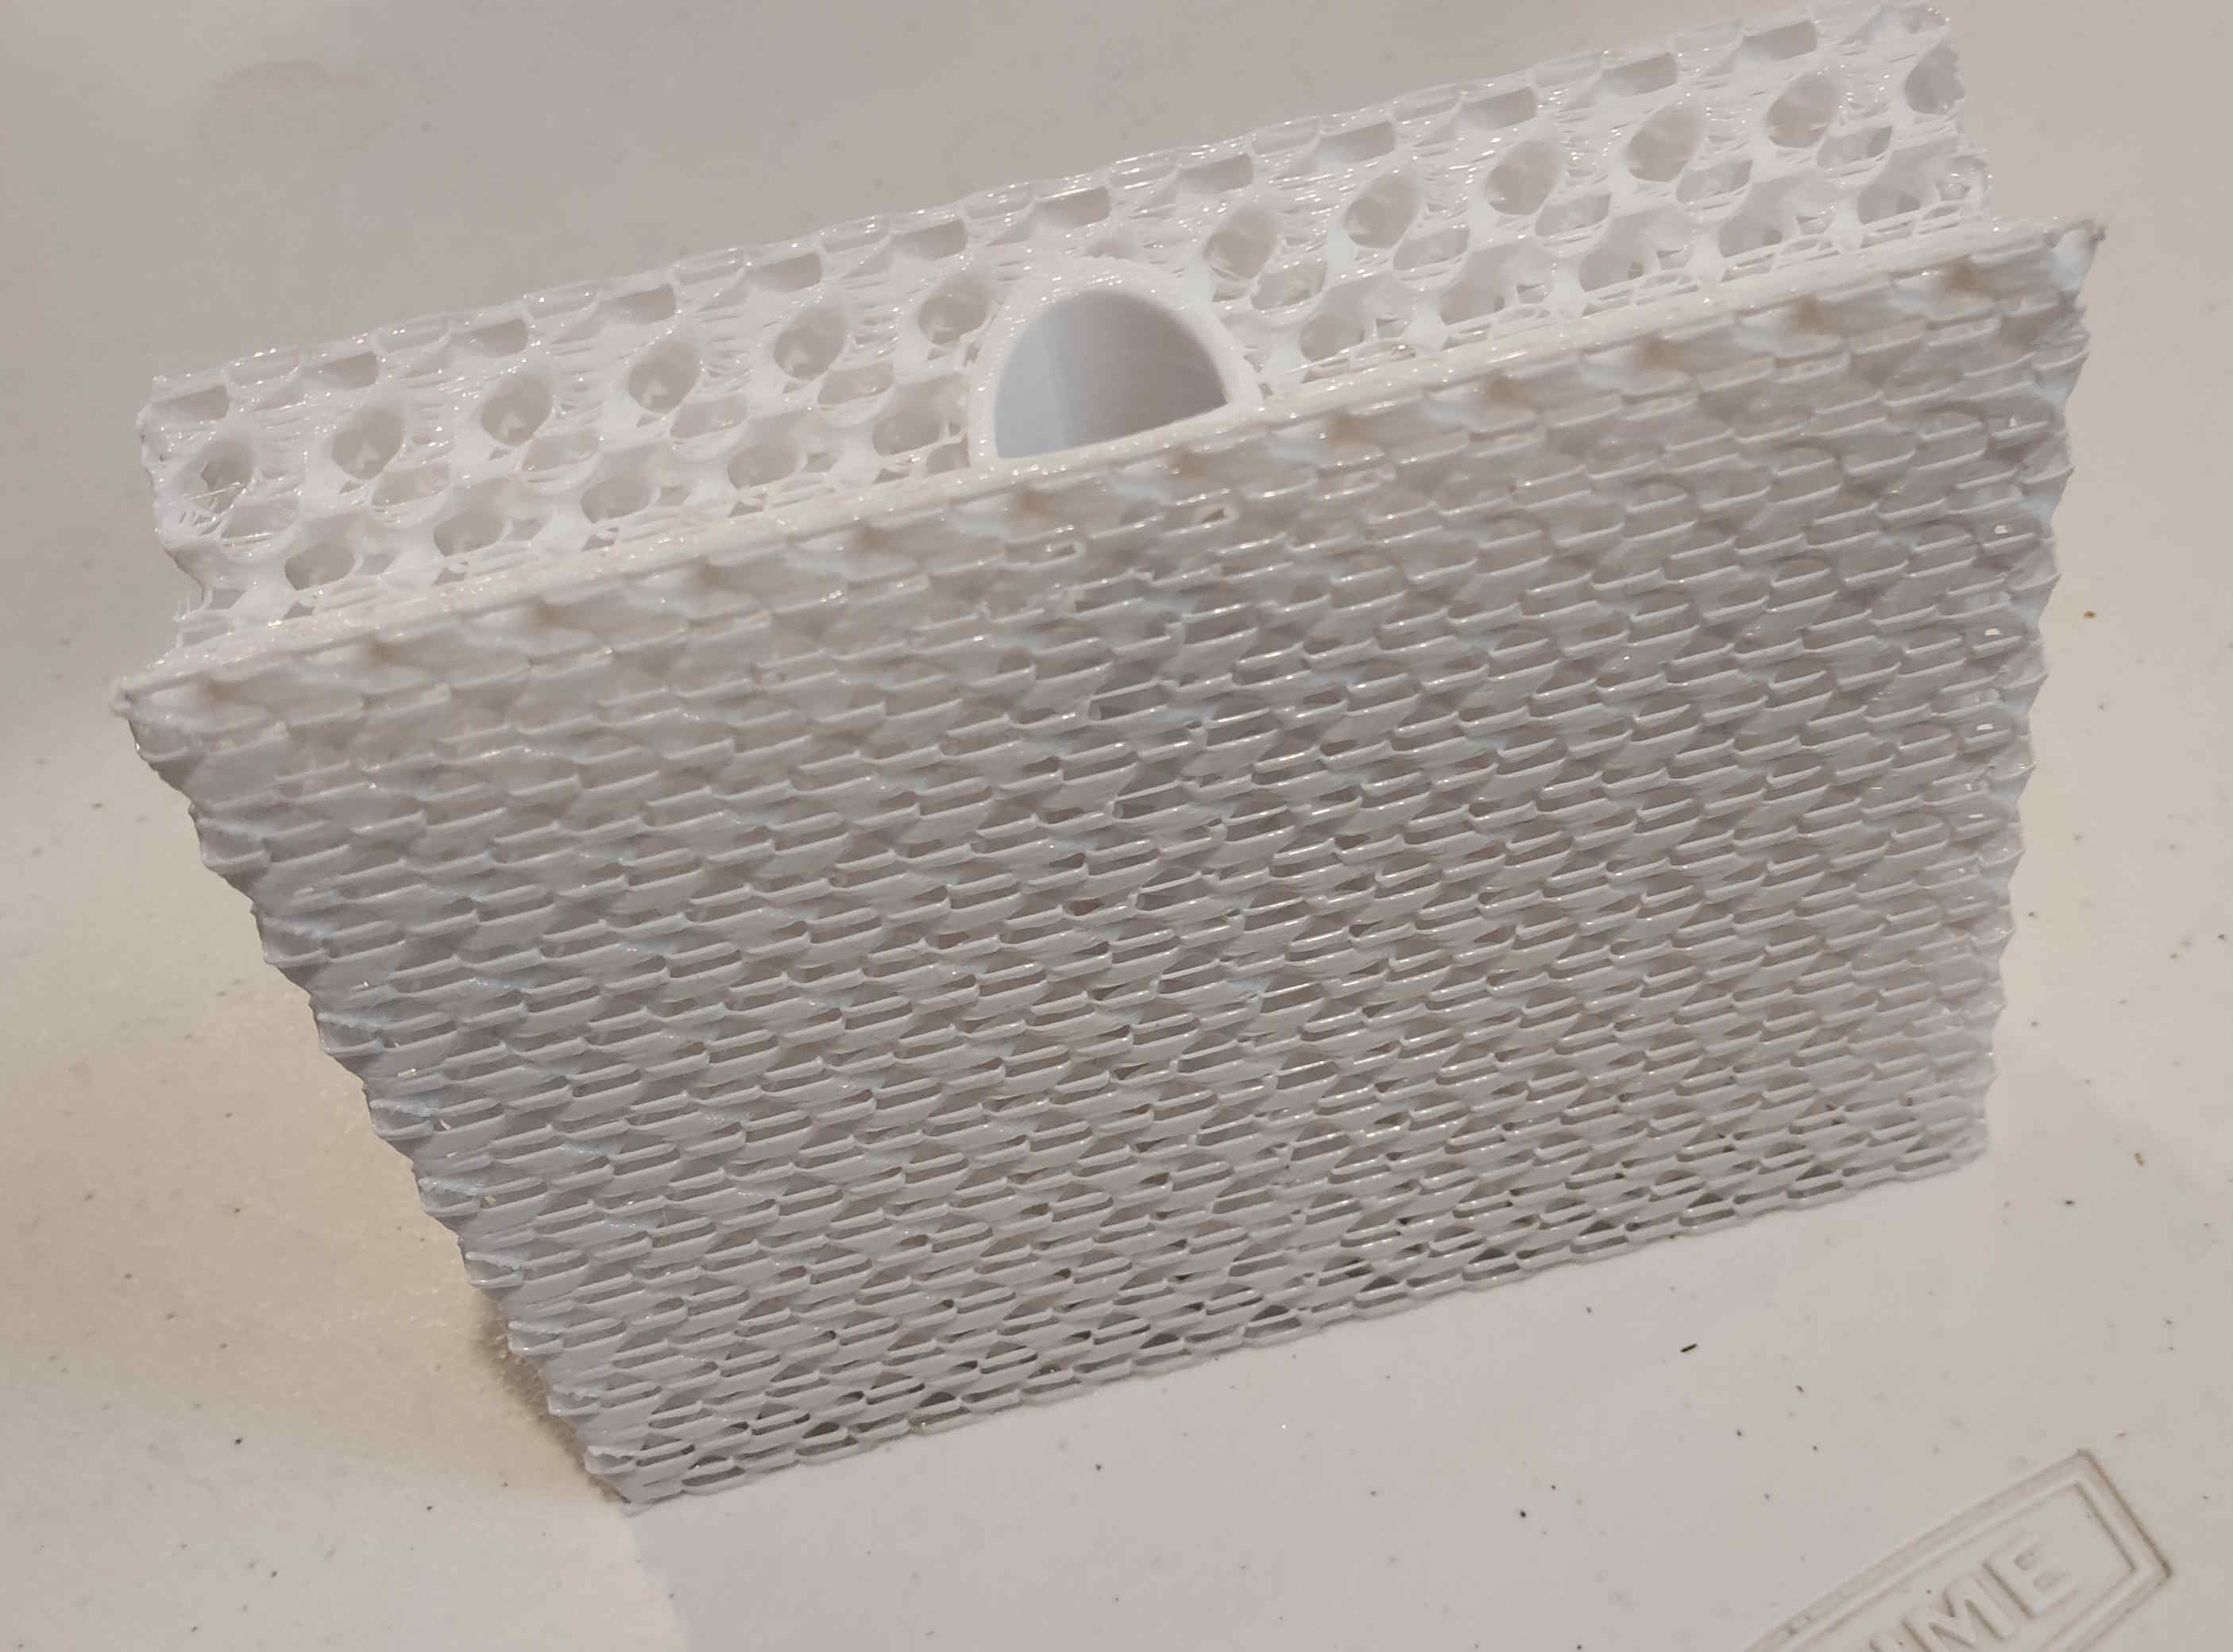
One of the neatest bits of the new design is that the evaporative 'pad' is 3D printed as well. It uses what looks like a gyroid infill pattern that allows the air from the fan to flow over the water as it's dripping down.
The main part that's not 3D printed is the reservior which is simply a rectangular injection-molded box which the body of the cooler sits nested just inside the lip of.
Plumbing
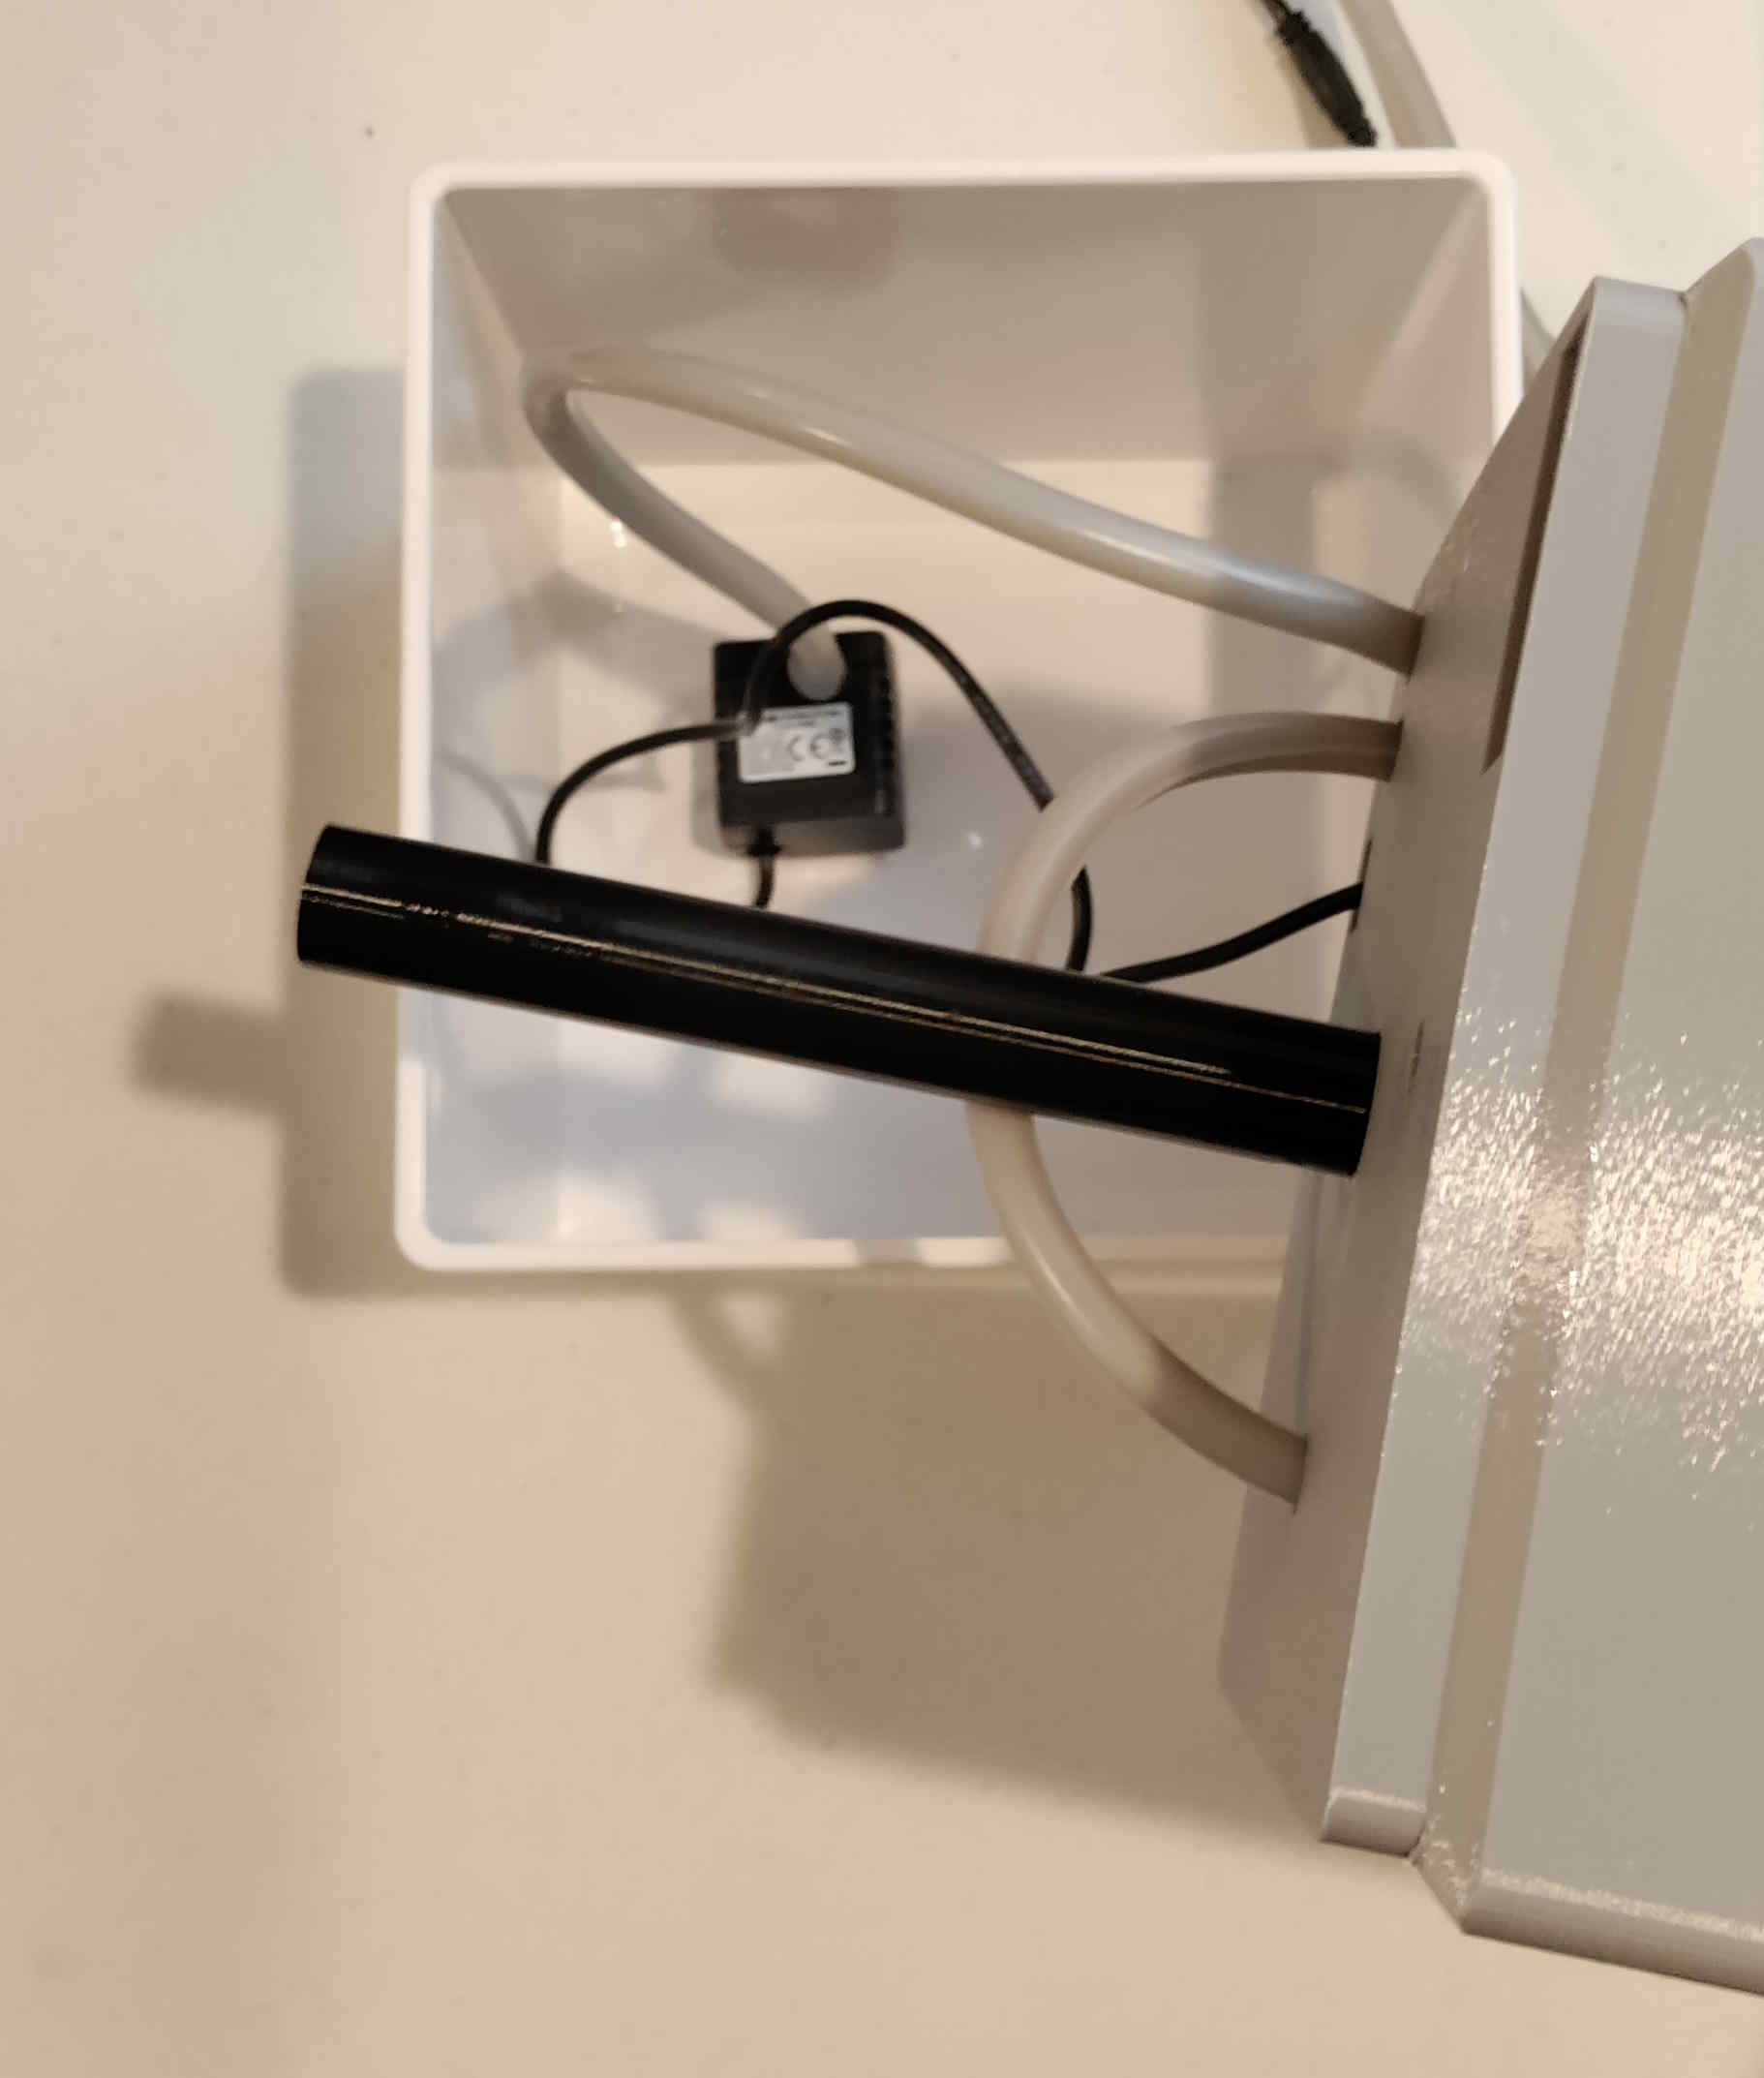
In the original version, there were several separate pieces of the rubber tubing to route the water between the ports, the drip trough, and the reservior. In the new version, the tubes from the mat are routed through the body directly to the pump and the drip trough. This means no additional tubing is needed. The new version also has a black, 3D printed downspout that guides water down into the reservior to avoid splashing noises.
So far the new version has managed to significantly reduce part count and complexity, but it does so even more aggresively for the electrical system.
Electrical
In the original, there was the fan and pump, but also: buttons, a 7-segment display, an ion generator, a float sensor, even an IR sensor (maybe some versions came with a remote control?), and of course the microcontroller to integrate them all together.
The new version only has the fan and the pump, both of which are commercial off-the-shelf parts. The fan fits in the slot in the 3D printed body, and the pump sits on suction cups on the bottom of the reservior. Both have stock cables which are simply routed outside the body. This means that virtually no extra components are need for integration.
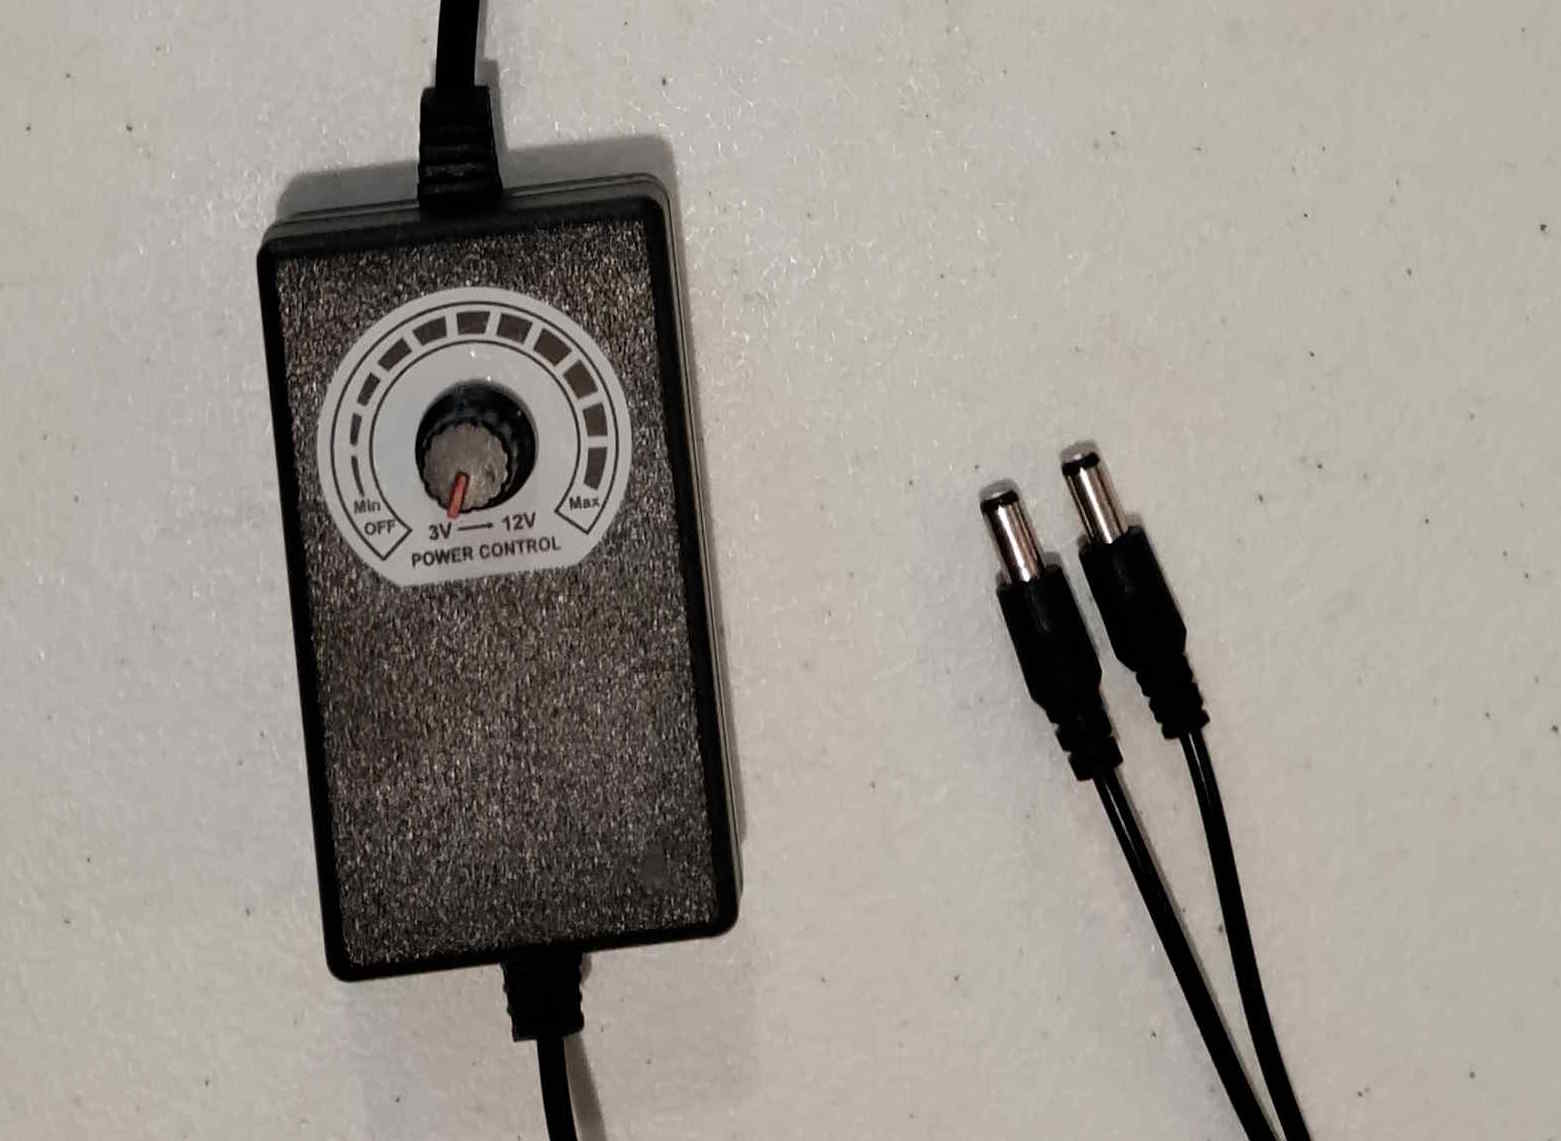
Now the only control for the cooler is the power supply, which has a knob that alters the voltage going to both the fan and the pump and therefore adjusts the speed of both.
Advantages
From the user's perspective this stripped-down design is a huge advantage since everything is simple enough that 3D printing replacements should be pretty straightforward (though the evporative 'pad' might take some tinkering with). You could even make some modifications or improvements easier than for something designed more conventionally.
Even if you don't want to print anything yourself, the fact that the manufacturer is not relying on whichever supplier has the molds for their parts means that you're much more likely to be able to get spare parts. This is particularly true for the evaporative pads since it's clear this was a problem with the previous generation of pads (which are no longer available for purchase).
The redesign also made some incremental improvements not related to the total design overhaul:
- The analog voltage control makes finding the sweet spot for temperature easier since in the original version there were only discrete steps to control fan speed and duty cycle.
- The reservior is larger in this version which makes it much less likely that water from the mat will overflow the cooler.
Disadvantages
Stripping down the design and functionality does have some trade-offs:
-
The new version doesn't auto-shutoff if the water level gets too low, it just sits there making weird noises until you turn it off.
-
No timer. The original had a shutoff timer which was convenient. Of course the design of the new one allows you to just plug it into an outlet timer if you want.
You could even plug the cooler into one of the outlet timers that runs on a daily schedule, that way it could turn itself on automatically at bedtime. This wouldn't have been possible with the original since it does not run automatically when given power.
-
You can't see the level of the water in the reservior. It seems like the most direct way to deal with this would've been to have a transparent or translucent reservior. That might've had the side-benefit of encouraging you to clean it more since you could see the gunk build up.
-
Since the tubes from the mat are routed through the cooler body, it looks like replacing the mat (which is a consumable and needs to be replaced every ~6 months) will be more of a pain than the original version where the tubes just plugged into the side of the body.
-
Since the body is 3D printed, which tends to produce porous parts that will always have higher surface area than the equivalent injection-molded part, I'm concerned this will lead to more bacterial growth. This might require more regular cleaning than the original.
-
The aesthetics of the new one are a significant downgrade from the original when seen up close. The 3D printing lines are very apparent, and the edges around the top are actually a little sharp where they were attached to the print bed. Personally I'm not concerned about this, but I could see someone wondering why they paid $100+ for this kind of (superficial) quality.
For me, the lack of auto-shutoff and having to deal with the tube routing when replacing the mats are the only two serious downsides.
Conclusion
This design radically simplifies, strips out non-essential functionality, and drops part count to the bare minimum. Time will tell whether the redesign will be worthwhile, but for myself I'm much happier having a version that is simpler and more repairable.